Digitizing Services: Turn Artwork into Embroidery Files

Embroidery has come a long way from hand-stitched heirlooms. In today’s digital world, custom digitizing services have made it possible to turn nearly any logo or piece of artwork into a stunning embroidery file. Whether you’re a small business owner wanting branded uniforms or a creative individual looking to personalize gear, digitizing is the key to stitching your ideas into reality. But how does it all work? Why is it essential? Let’s dive deep into everything you need to know about custom embroidery digitizing.
What Are Custom Digitizing Services?
The Basics of Embroidery Digitizing
Let’s get one thing straight: embroidery digitizing isn’t just about scanning a picture. It’s the process of converting artwork (like a logo, illustration, or design) into a digital file that embroidery machines can read. This file tells the machine exactly how to stitch the design—what direction to go in, how dense the stitches should be, where to start, where to stop, and so much more.
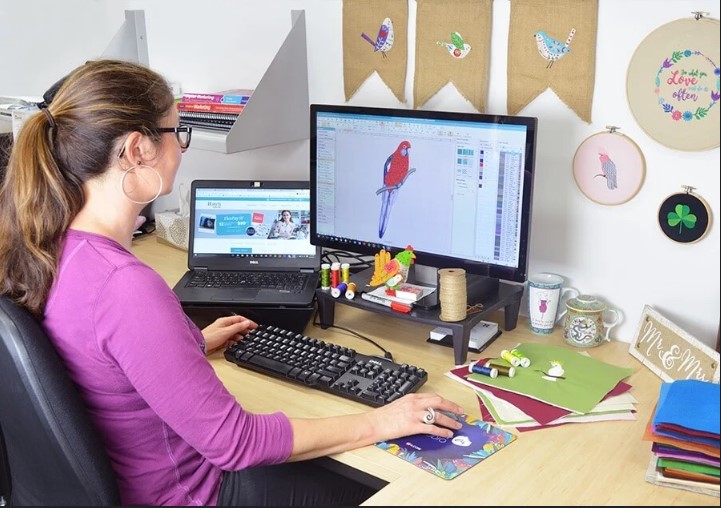
The digitizing process involves creating a stitch map. Think of it like converting a photo into a dot-to-dot puzzle—each dot (or stitch) needs to be placed with precision. A digitizer uses specialized software to assign stitch types (like satin, fill, or run stitches) depending on the complexity and shape of the design.
Why Digitizing Is Essential for Embroidery
Here’s the deal without digitizing, embroidery machines are blind. You can’t just feed them a JPG or PNG file and expect results. They don’t understand colors, layers, or resolution like printers do. Instead, they need a roadmap something that gives instructions down to the last stitch. That’s what a digitized file does.
If your design isn’t digitized correctly, expect issues like broken threads, distorted images, or even ruined garments. On the flip side, a properly digitized file makes embroidery look professional, clean, and accurate, even on tough materials like hats or thick jackets.
Best embroidery digitizing services ensure high-quality, precise, and flawless designs for your embroidery projects. Whether you need digitized logos, custom artwork, or intricate patterns, choosing a professional service is crucial. The Best Embroidery Digitizing Services provide top-notch quality, quick turnaround times, and excellent customer support. Their experienced team uses advanced technology to deliver accurate stitch patterns, ensuring that your embroidery stands out. With a commitment to perfection, Digitizing Buddy transforms your designs into beautifully embroidered masterpieces. Trust the experts to bring your vision to life with the best embroidery digitizing services available.
How the Digitizing Process Works
Step-by-Step Breakdown of Digitizing
Ever wondered what happens behind the scenes? Here’s how the magic unfolds:
- Receiving the Artwork: You send over your logo or design—could be a PNG, JPG, PDF, even a hand sketch.
- Analyzing the Design: The digitizer examines the complexity, colors, and elements involved. They decide on stitch types and directions.
- Mapping the Stitches: Using digitizing software (like Wilcom or Hatch), the design is broken down into a pattern of stitches.
- Assigning Stitch Types: Fill stitches for large areas, satin stitches for borders, and run stitches for fine lines.
- Testing and Editing: Before the final file is sent, the design is tested on a machine, and adjustments are made if needed.
- Delivering the File: You get the digitized file, often in .DST, .PES, .EXP, or other machine-compatible formats.
This process requires both technical skill and artistic judgment. It’s like translating a painting into a recipe—you need to know both art and science to do it right.
Common File Formats Used
Digitized embroidery files come in many formats depending on the machine. Here are a few common ones:
- .DST: Used widely by Tajima machines; considered industry standard.
- .PES: Used for Brother embroidery machines.
- .EXP: Compatible with Melco machines.
- .JEF: For Janome machines.
It’s important to know your machine’s format before ordering a digitized design. A good digitizing service will provide multiple formats or convert files as needed.
Benefits of Using Professional Digitizing Services
Accuracy and Detail Preservation
You might be thinking, can’t I just use an automatic converter? Well, you could, but don’t expect great results. Professional digitizing services ensure your design retains its original look, even when stitched with thread. Tiny details, gradient transitions, and clean lines are hard to replicate without skill.
A good digitizer knows how to adjust designs for thread tension, fabric pull, and stitch behavior. They can take a messy or intricate image and turn it into thread magic that looks sharp on polos, jackets, caps you name it.
Time-Saving and Cost-Effective
DIY digitizing might seem cheaper at first glance, but the learning curve is steep. Between buying expensive software, spending hours learning, and potentially ruining garments with bad stitch-outs, the costs add up quickly.
Hiring a pro? That’s peace of mind and a quick turnaround. You send your artwork, and often within 24 hours, you get a production-ready embroidery file. Many services even offer edits or revisions if you’re not satisfied.
In the long run, working with an expert saves both time and money—and helps avoid the headache of troubleshooting machine errors.
Turning Logos into Embroidery Files
What Makes a Logo Embroidery-Ready
Not all logos are created equal—especially when it comes to embroidery. A logo with thin lines, tiny text, or gradient fills might look awesome on screen but can be a nightmare to stitch. So, how do you make it embroidery-friendly?
- Simplify where possible: Logos should have clean, bold elements.
- Avoid tiny text: Letters smaller than 4mm can get lost in stitching.
- Stick to solid colors: Gradients don’t translate well in thread.
A digitizer might tweak the original logo slightly—thickening lines, removing fine print, or replacing gradients with color blocks—to ensure a quality stitch-out. These changes don’t ruin your brand; they actually enhance its visibility on fabric.
Adjustments Often Needed in Logos for Stitching
Your digitizer may recommend the following adjustments:
- Letter spacing tweaks to avoid merging of stitches.
- Outline additions to boost contrast on certain fabrics.
- Thread color changes based on your garment color.
These edits help your logo look clean and readable, whether it’s stitched on a cotton t-shirt or a leather bag. Trust your digitizer—they know what looks good in thread.


